
Account migration tools typically involve parsing and transforming 3rd-party data into the format expected by your app.
Many teams choose to build custom internal apps for such tools, which provide the convenience of writing code within your app's codebase - but they also introduce lots of frontend overhead. Other teams might opt to build inside a no-code platform, which removes the need to write any frontend code, but takes you out of your app's codebase entirely.
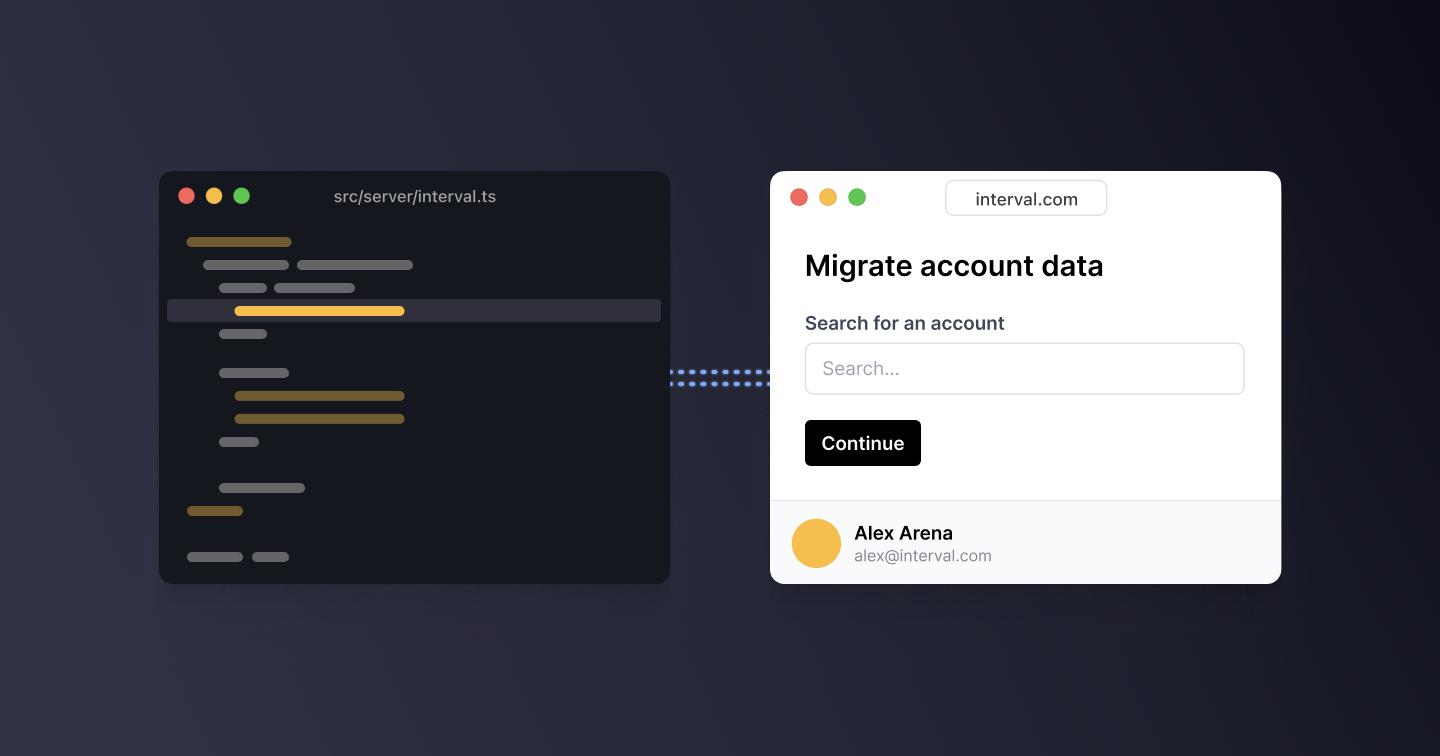
Interval gives developers the best of both worlds: simply wrap async functions in your app with the Interval SDK, and get interactive, multi-step forms in your browser, without writing any frontend code. This means that the experience of writing Interval actions is as easy as writing a CLI script - but the end result is a full web app with auth and audit logs, perfect for handing off to your team.
In this guide, we'll show you how to create a simple data migration tool that works seamlessly with your app's codebase. We'll cover these concepts:
- Using Interval's search API to perform an account lookup
- Using Interval's file upload API to collect external customer data
- Running arbitrary code from your app's backend between steps to prepare the data to be imported
- Using Interval's loading APIs to deliver a quality user experience while the data is being processed
Prerequisites
In this tutorial, we're going to build a tool to import videos from a 3rd party service into our video hosting app. The tool we create will have three steps:
- Find an account
- Collect the data to import via file upload
- Import the data into our database
The example repo includes a simple Node app with the Interval SDK and connects to an SQLite database using Prisma.
After you setup your Interval Server instance, get your personal development key from the Keys page and add it to the .env file in the project root.
Step 1: Account lookup
First, let's create a new action.
Interval actions are defined in code, so we'll start by creating a new action called import_videos:
import 'dotenv/config'
import Interval, { io } from '@interval/sdk'

const interval = new Interval({
  endpoint: 'wss://<YOUR INTERVAL SERVER URL>/websocket',
  apiKey: process.env.INTERVAL_KEY,
  actions: {
    import_videos: async () => {},
  },
})

interval.listen()
Start your dev server and wait for the Interval listener to come online. It will give you a link to view the action in the Console:
- npm
- yarn
npm run dev

[Interval]  🔗 Connected! Access your actions at: https://<YOUR INTERVAL SERVER URL>/dashboard/your-org/develop
yarn dev

[Interval]  🔗 Connected! Access your actions at: https://<YOUR INTERVAL SERVER URL>/dashboard/your-org/develop
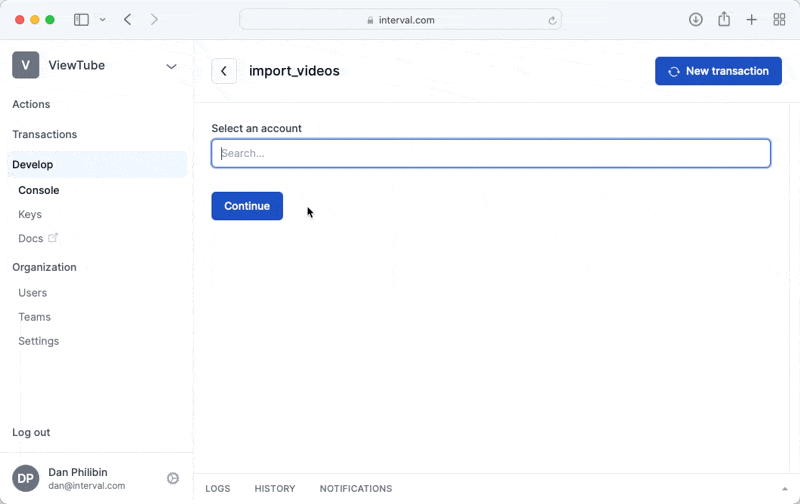
Next, let's add an input for account lookup.
We'll use Interval's io.search method, which displays a search box to the user and enables a remote search on your database given any search query provided.
import 'dotenv/config'
import Interval, { io } from '@interval/sdk'
import { findUsers } from '../util'

const interval = new Interval({
  endpoint: 'wss://<YOUR INTERVAL SERVER URL>/websocket',
  apiKey: process.env.INTERVAL_KEY,
  actions: {
    import_videos: async () => {
      const user = await io.search('Select an account', {
        onSearch: query => {
          return findUsers(query)
        },
        renderResult: u => ({
          label: `${u.firstName} ${u.lastName}`,
          description: u.email,
        }),
      })
    },
  },
})

interval.listen()
Save your file and try running the action in the browser. The example project seeds your database with 50 users, so you can type any character into the search input to search for an account.
Step 2: File upload
We want our onboarding team to be able to upload customers' data to import, so let's add a file uploader to the action.
Add a file uploader to the action:
import 'dotenv/config'
import Interval, { io } from '@interval/sdk'
import { findUsers } from '../util'

const interval = new Interval({
  endpoint: 'wss://<YOUR INTERVAL SERVER URL>/websocket',
  apiKey: process.env.INTERVAL_KEY,
  actions: {
    import_videos: async () => {
      const user = await io.search('Select an account', {
        onSearch: query => {
          return findUsers(query)
        },
        renderResult: u => ({
          label: `${u.firstName} ${u.lastName}`,
          description: u.email,
        }),
      })

      const videosFile = await io.input.file('Select a file', {
        allowedExtensions: ['.json'],
      })

      const videos = await videosFile.json()

      await io.display.table('Videos to import', {
        data: videos,
        helpText: 'Press Continue to run the import.',
      })
    },
  },
})

interval.listen()
Save the file and run the action again in your browser.
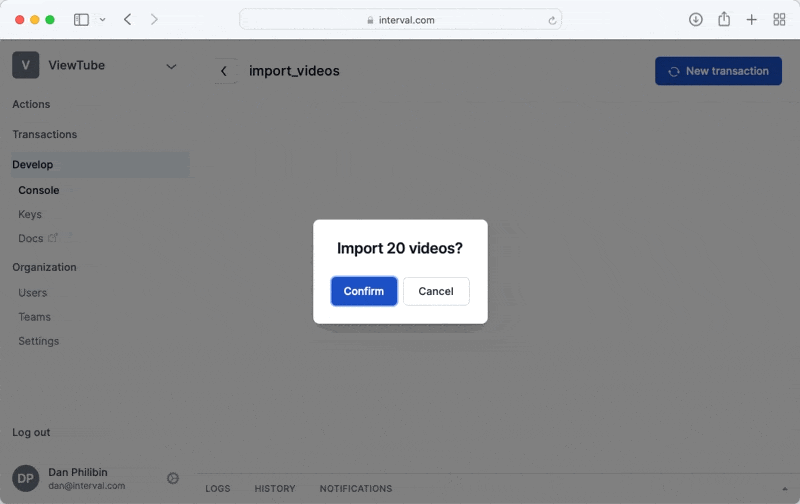
After you pick an account, select the sample-import.json file from the example project and press the Continue button.
The action will display a table of the videos in the file.

Now we have the raw JSON to work with, and we can move on to preparing the data for our database.
Step 3: Convert and import
Inspecting the import file, we see a few differences between the incoming data and our schema:
- The import uses
video.name, but our database usesvideo.title - The import is missing
thumbnailUrlandslug - The import's
createdAtcolumn uses Unix epoch time, which we need to convert to aDate
Since Interval actions are just JavaScript functions, we can easily transform this data before we import it.
Let's write some code to convert the incoming videos into our app's Video model.
We'll add a confirmation step before writing data and use our app's slug and thumbnail generators to create the missing inputs.
import 'dotenv/config'
import Interval, { io } from '@interval/sdk'
import { findUsers } from '../util'
import {
  findUsers,
  generateThumbnail,
  getCollisionSafeSlug,
  prisma,
} from '../util'
import { Video } from '@prisma/client'

const interval = new Interval({
  endpoint: 'wss://<YOUR INTERVAL SERVER URL>/websocket',
  apiKey: process.env.INTERVAL_KEY,
  actions: {
    import_videos: async () => {
      const user = await io.search('Select an account', {
        onSearch: query => {
          return findUsers(query)
        },
        renderResult: u => ({
          label: `${u.firstName} ${u.lastName}`,
          description: u.email,
        }),
      })

      const videosFile = await io.input.file('Select a file', {
        allowedExtensions: ['.json'],
      })

      const videos = await videosFile.json()

      await io.display.table('Videos to import', {
        data: videos,
        helpText: 'Press Continue to run the import.',
      })

      // Add a confirmation step
      const confirmed = await io.confirm(`Import ${videos.length} videos?`)
      if (!confirmed) return 'Action canceled, no videos imported'

      const importedVideos: Video[] = []

      for (let i = 0; i < videos.length; i++) {
        // use our app's internal methods to create the missing inputs
        const thumbnailUrl = await generateThumbnail(videos[i].url)
        const slug = await getCollisionSafeSlug(videos[i].name)

        const createdAt = new Date(videos[i].createdAt * 1000)

        const video = await prisma.video.create({
          data: {
            title: videos[i].name,
            url: videos[i].url,
            thumbnailUrl,
            slug,
            createdAt,
            user: { connect: { id: user.id } },
          },
        })

        importedVideos.push(video)
      }

      return `Imported ${importedVideos.length} videos for ${user.email}`
    },
  },
})

interval.listen()
Save the file and head back to your browser to run the action. Select an account, pick the import file, confirm the import and then press the Continue button.
We're almost finished, but the user experience is not great - there's currently a blank white screen while we wait for the import to complete.
Let's fix that by adding a progress bar:
import 'dotenv/config'
import Interval, { io } from '@interval/sdk'
import Interval, { io, ctx } from '@interval/sdk'
import {
  findUsers,
  generateThumbnail,
  getCollisionSafeSlug,
  prisma,
} from '../util'
import { Video } from '@prisma/client'

const interval = new Interval({
  endpoint: 'wss://<YOUR INTERVAL SERVER URL>/websocket',
  apiKey: process.env.INTERVAL_KEY,
  actions: {
    import_videos: async () => {
      const user = await io.search('Select an account', {
        onSearch: query => {
          return findUsers(query)
        },
        renderResult: u => ({
          label: `${u.firstName} ${u.lastName}`,
          description: u.email,
        }),
      })

      const videosFile = await io.input.file('Select a file', {
        allowedExtensions: ['.json'],
      })

      const videos = await videosFile.json()

      await io.display.table('Videos to import', {
        data: videos,
        helpText: 'Press Continue to run the import.',
      })

      const confirmed = await io.confirm(`Import ${videos.length} videos?`)
      if (!confirmed) return 'Action canceled, no videos imported'

      ctx.loading.start({
        title: 'Uploading videos...',
        itemsInQueue: videos.length,
      })

      const importedVideos: Video[] = []

      for (let i = 0; i < videos.length; i++) {
        // use our app's internal methods to create the missing inputs
        const thumbnailUrl = await generateThumbnail(videos[i].url)
        const slug = await getCollisionSafeSlug(videos[i].name)

        const createdAt = new Date(videos[i].createdAt * 1000)

        const video = await prisma.video.create({
          data: {
            title: videos[i].name,
            url: videos[i].url,
            thumbnailUrl,
            slug,
            createdAt,
            user: { connect: { id: user.id } },
          },
        })

        importedVideos.push(video)

        ctx.loading.completeOne()
      }

      return `Imported ${importedVideos.length} videos for ${user.email}`
    },
  },
})

interval.listen()
One last time, save your changes and run the action in your browser. This time we'll see a nice progress bar that updates after each video is imported.
Wrapping up
And that's it! Now we have an import tool to hand off to our onboarding team.
Writing an Interval action is similar to writing a CLI script - just write your backend code, and use Interval's I/O methods to collect input and display output when needed. But unlike a CLI script, Interval actions' UI runs in the browser. In the same amount of time it would take to write a CLI script, we now have a browser-based tool that anyone on our team can use.
The tool we created in this guide is simple: it accepts a JSON file, converts the data, and imports it into our database. But there are many ways you could improve this action:
- Use zod to parse the JSON against a schema and throw an error if the data is invalid
- Catch warnings or errors and send a Slack or email notification to the engineering team if something goes wrong
- Enqueue background jobs to migrate the video files to our hosting platform
Since Interval actions are just JavaScript functions, just about anything you can do in code, you can also do with Interval. ✨
Happy coding!
Build internal tools fast, with code.
Interval is a thoughtful, intuitive approach to quickly building powerful UIs that integrate seamlessly with your backend—no API endpoints, drag-and-drop, or frontend code required.