Bulk issue editor via the GitHub API
Interval works right in your existing codebase and integrates seamlessly with any external APIs you're using. This example demos a tool that leverages GitHub's API. It supports selecting and managing multiple issues at once within your repositories, all via a dynamic UI generated automatically by Interval.
How it works
info
You'll need a GitHub API key or personal access token for this example. Find out how to generate a personal access token here.
First, we'll update the basic definition of an Interval action with a call to the GitHub to fetch and display repositories we have access to. In the example code snippets below, we'll use a custom function to simplify fetch calls to the GitHub API.
import { Action, io } from "@interval/sdk";
import { githubAPI } from "../util";

async function githubAPI(method, url, body = null) {
  const auth = Buffer.from(
    `${process.env.GITHUB_USER}:${process.env.GITHUB_KEY}`
  ).toString("base64");
  const options = {
    method,
    headers: {
      Authorization: `Basic ${auth}`,
      Accept: "application/vnd.github.v3+json",
    },
  };

  if (body) {
    options["body"] = JSON.stringify(body);
  }

  const res = await fetch(url, options);
  return await res.json();
}

export default new Action(async () => {
  const repos = await githubAPI(
    "GET",
    "https://api.github.com/user/repos?affiliation=owner&type=public"
  );
  const selectedRepos = await io.select.table(
    "Select a repo to edit issues for",
    {
      data: repos,
      columns: [
        "full_name",
        "created_at",
        { label: "owner", renderCell: row => row.owner.login },
      ],
      maxSelections: 1,
    }
  );
});
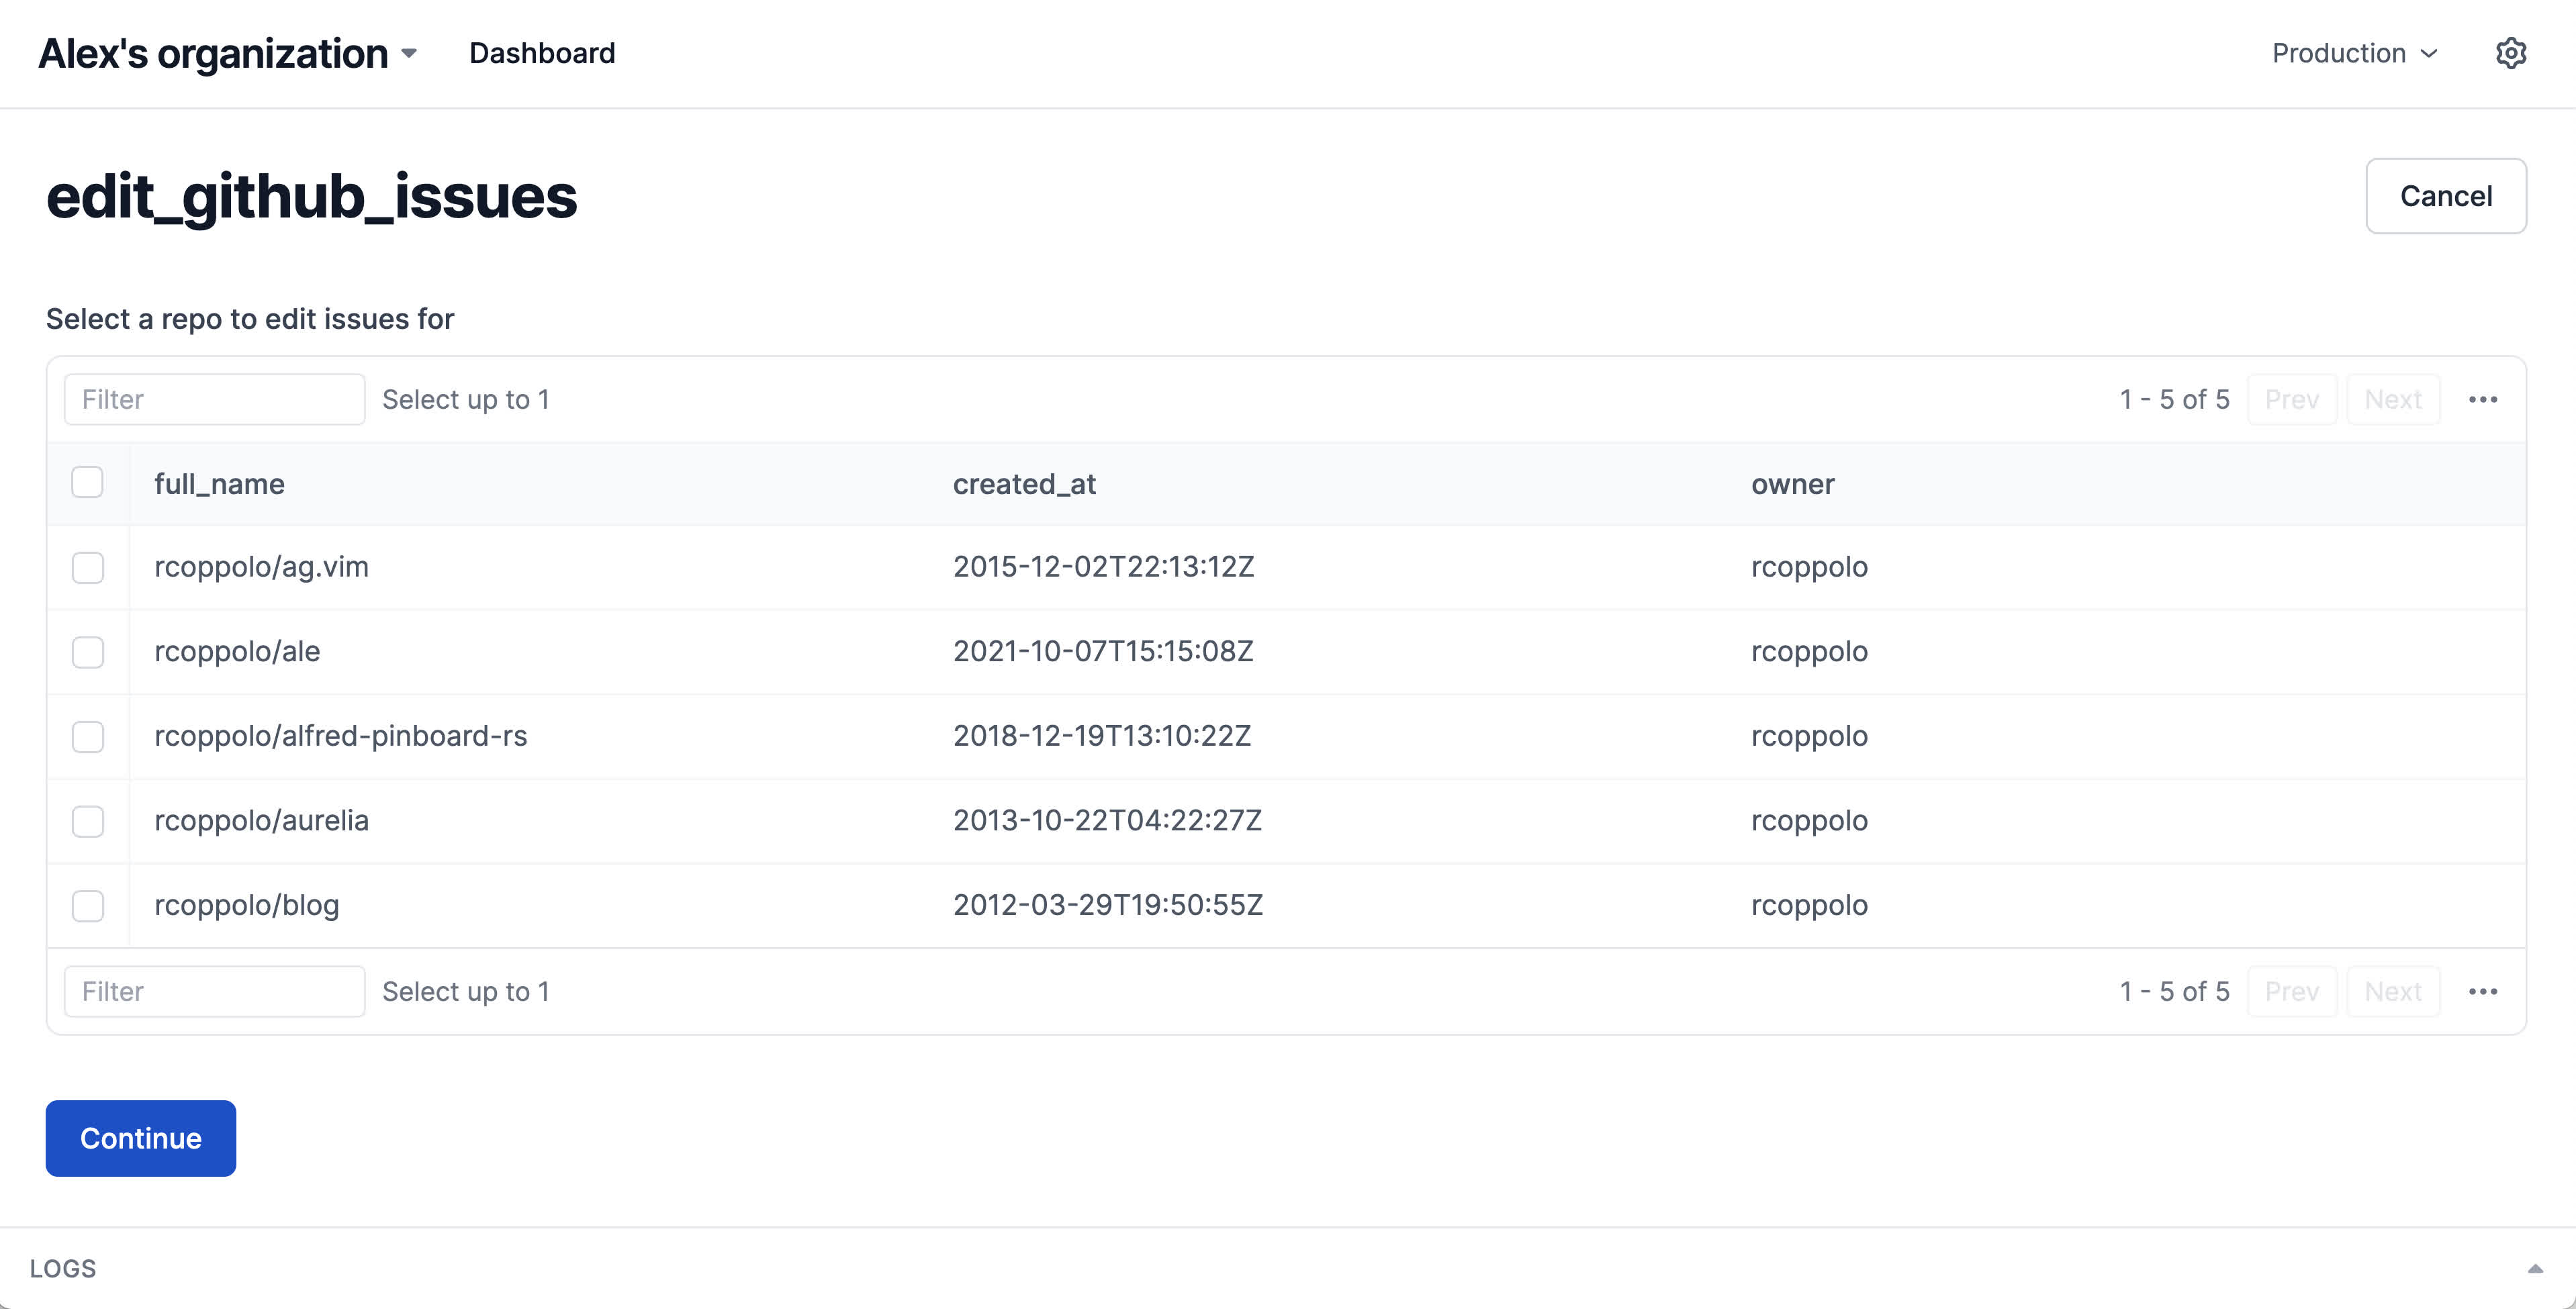
If you test out this tool with your personal development key, you'll be able to find the action in your Development environment. When run, the action lists out available repositories in a table for selection.

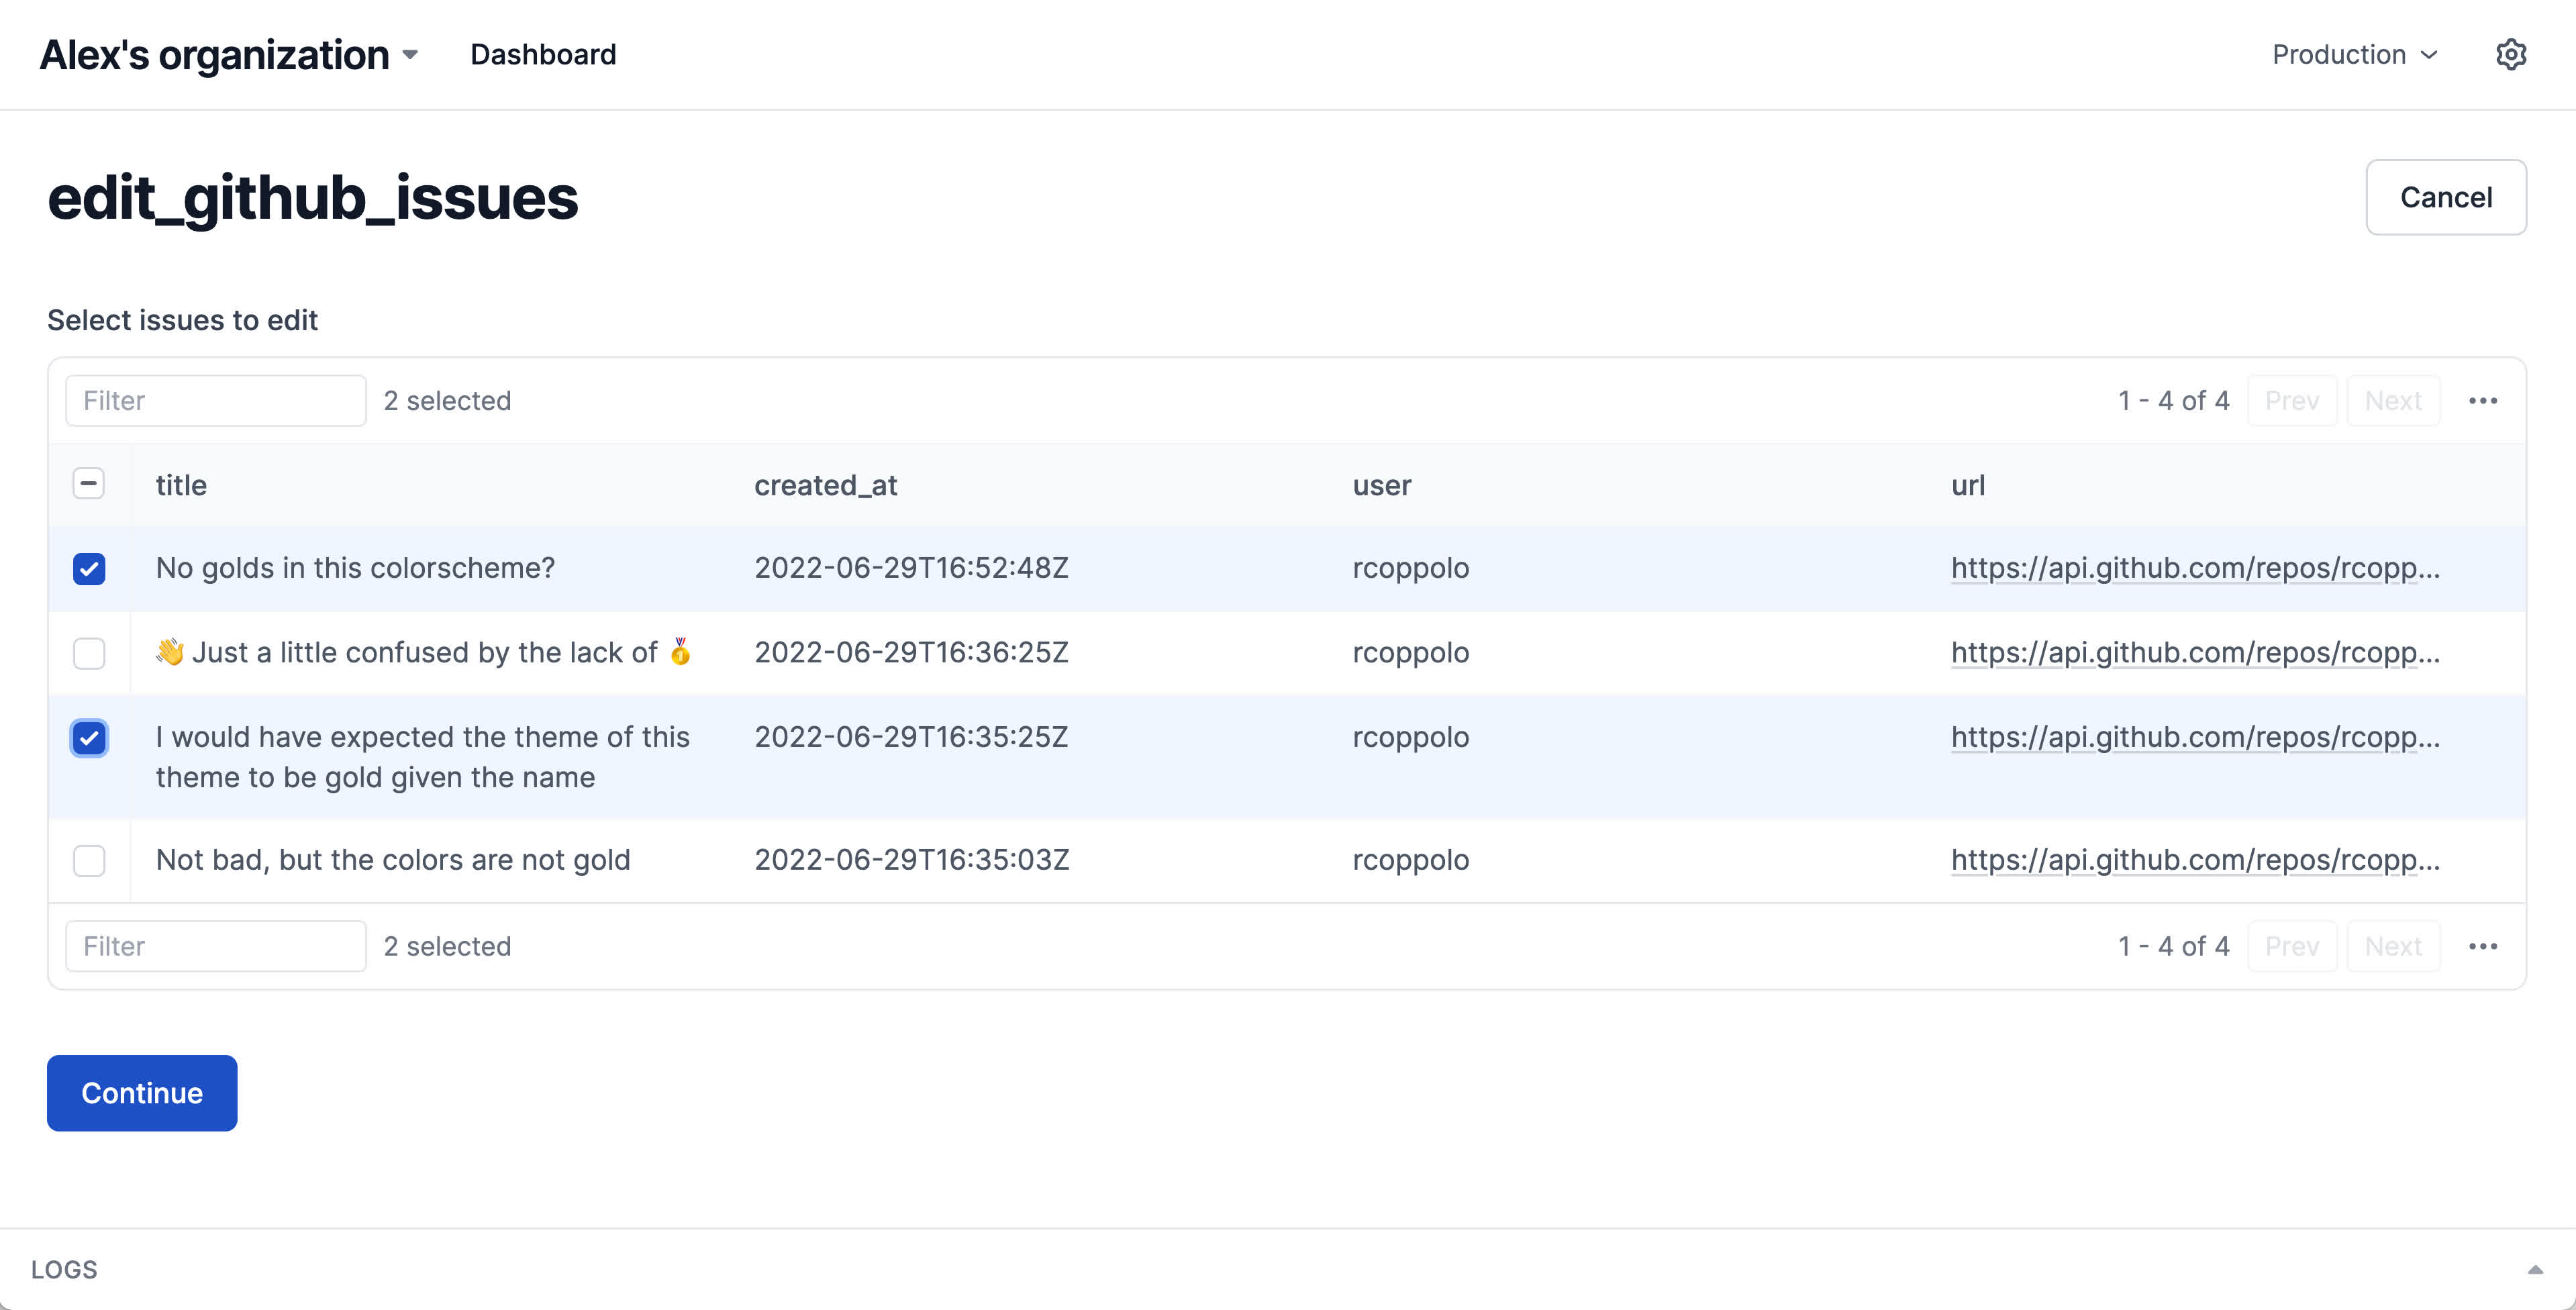
We'll now fetch issues and additional data about the selected repo, and allow multiple issues to be selected for editing.
import { Action, io } from "@interval/sdk";
import { githubAPI } from "../util";

async function githubAPI(method, url, body = null) {
  const auth = Buffer.from(
    `${process.env.GITHUB_USER}:${process.env.GITHUB_KEY}`
  ).toString("base64");
  const options = {
    method,
    headers: {
      Authorization: `Basic ${auth}`,
      Accept: "application/vnd.github.v3+json",
    },
  };

  if (body) {
    options["body"] = JSON.stringify(body);
  }

  const res = await fetch(url, options);
  return await res.json();
}

export default new Action(async () => {
  const repos = await githubAPI(
    "GET",
    "https://api.github.com/user/repos?affiliation=owner&type=public"
  );
  const selectedRepos = await io.select.table(
    "Select a repo to edit issues for",
    {
      data: repos,
      columns: [
        "full_name",
        "created_at",
        { label: "owner", renderCell: row => row.owner.login },
      ],
      maxSelections: 1,
    }
  );

  const repo = selectedRepos[0];
  const issues = await githubAPI(
    "GET",
    `https://api.github.com/repos/${repo.full_name}/issues`
  );
  const labels = await githubAPI(
    "GET",
    `https://api.github.com/repos/${repo.full_name}/labels`
  );

  const selectedIssues = await io.select.table("Select issues to edit", {
    data: issues,
    columns: [
      "title",
      "created_at",
      { label: "user", renderCell: row => row.user.login },
      "url",
    ],
  });
});

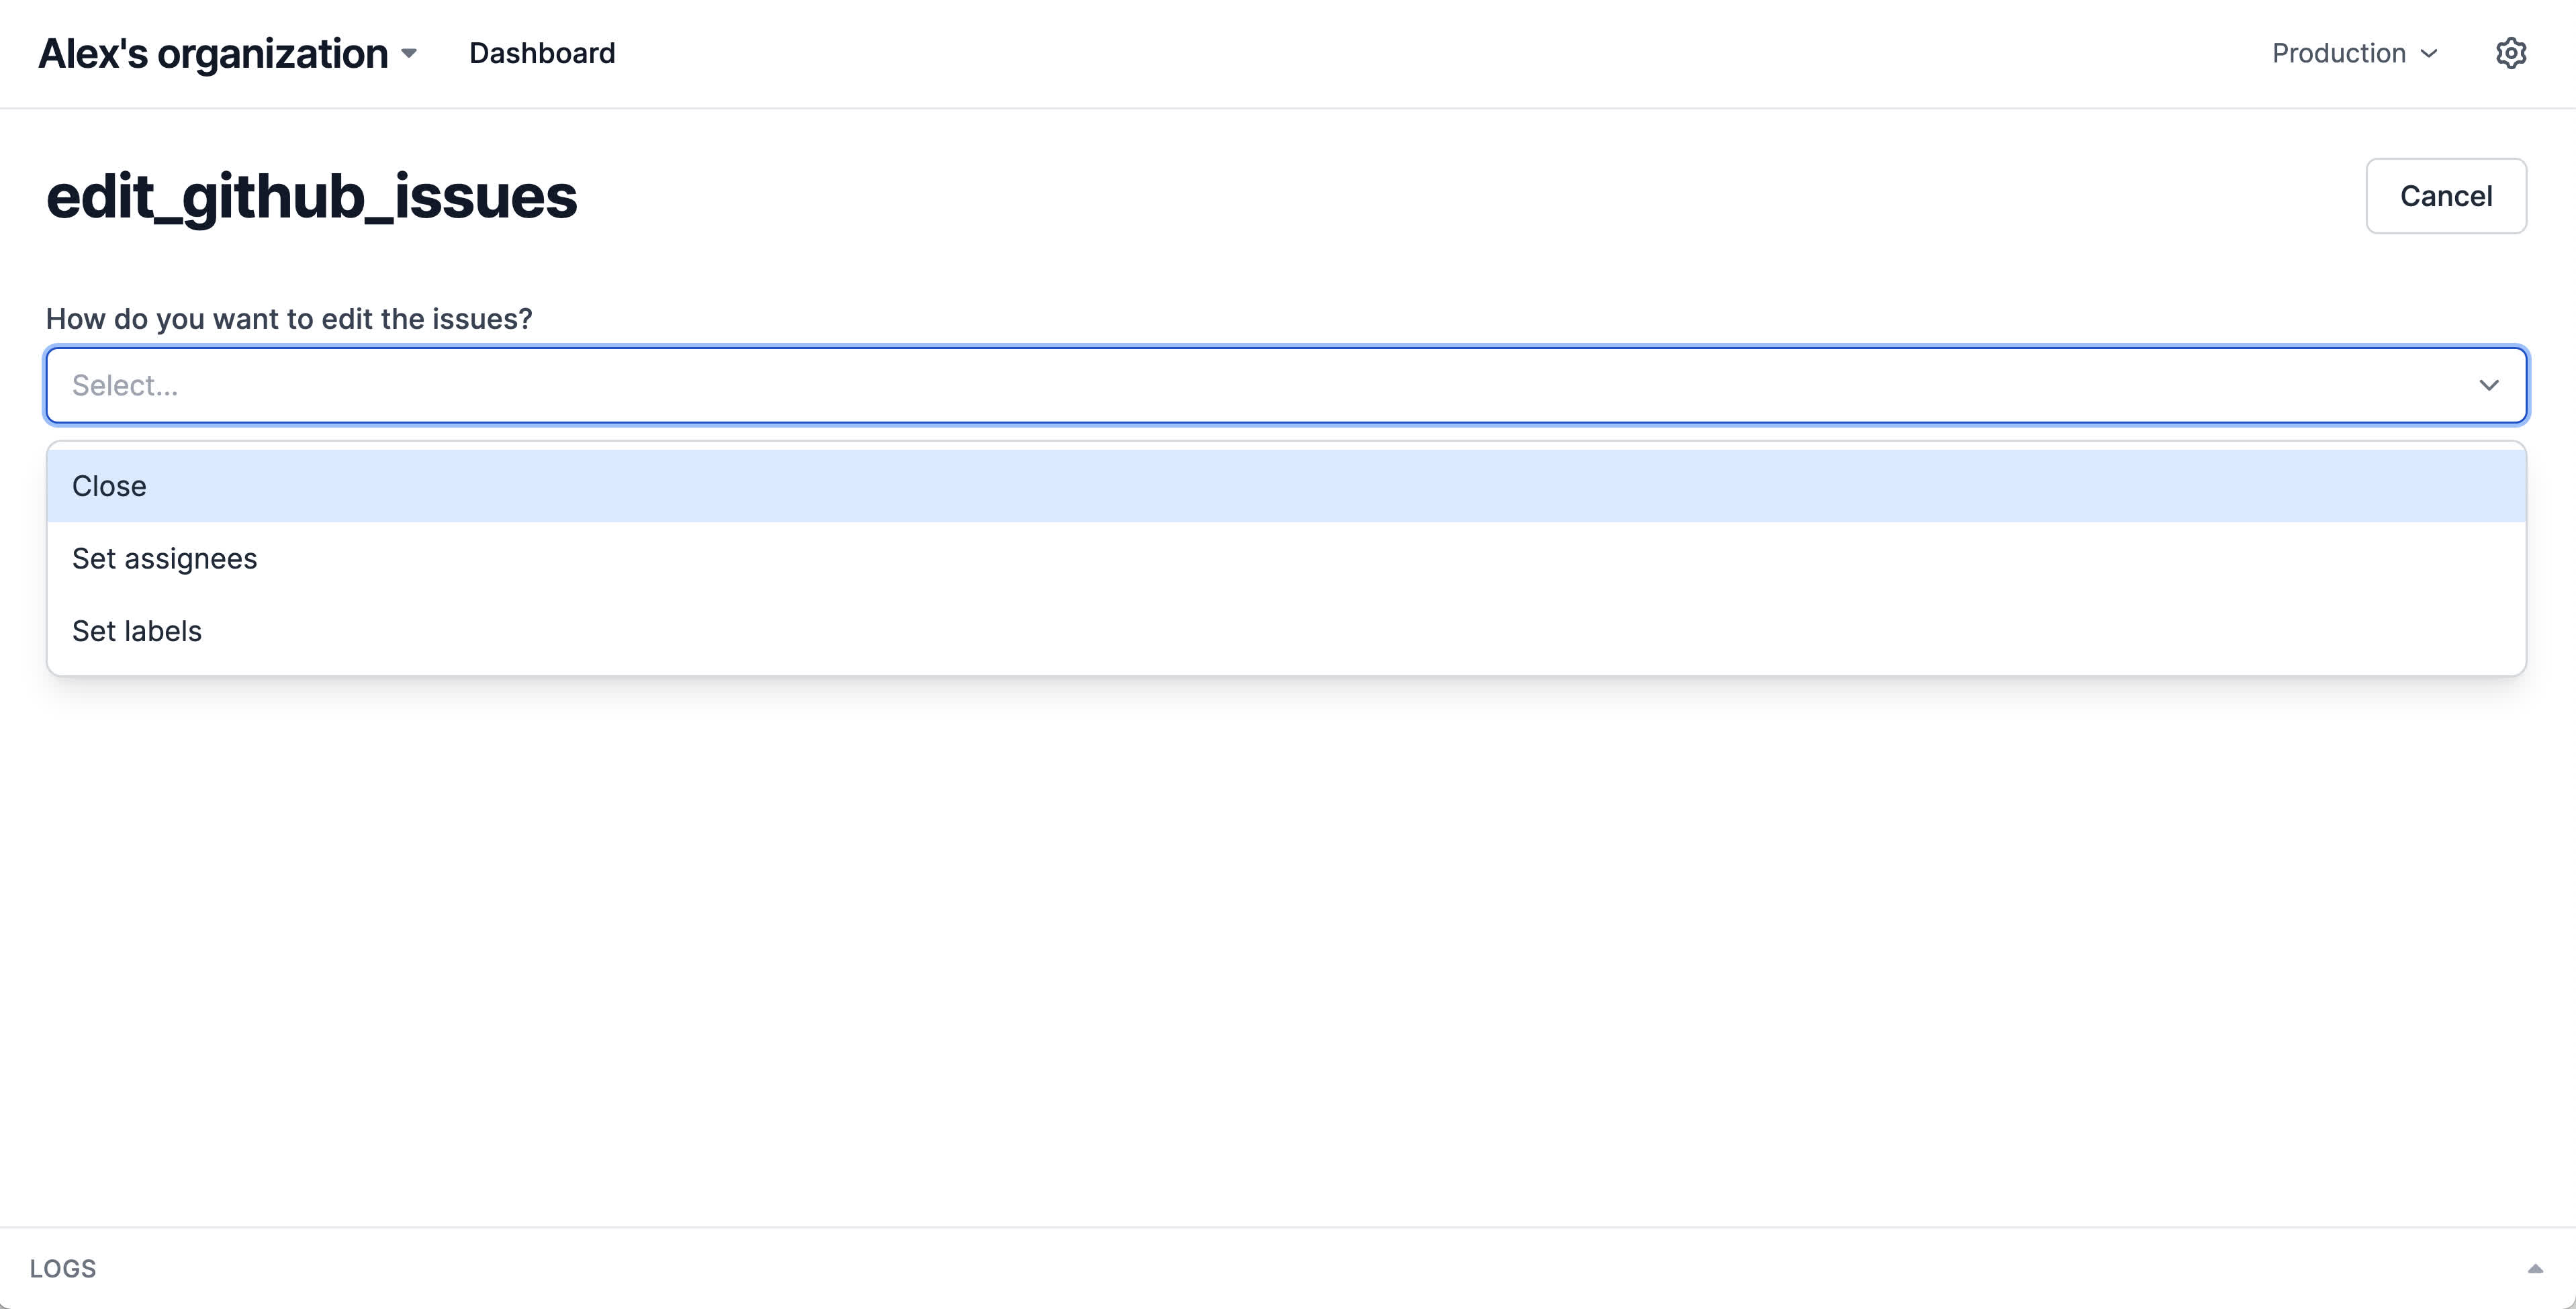
Once a set of issues are selected, we'll provide the user with a choice of how they want to edit them. For now we'll choose between closing the issues or adding labels.
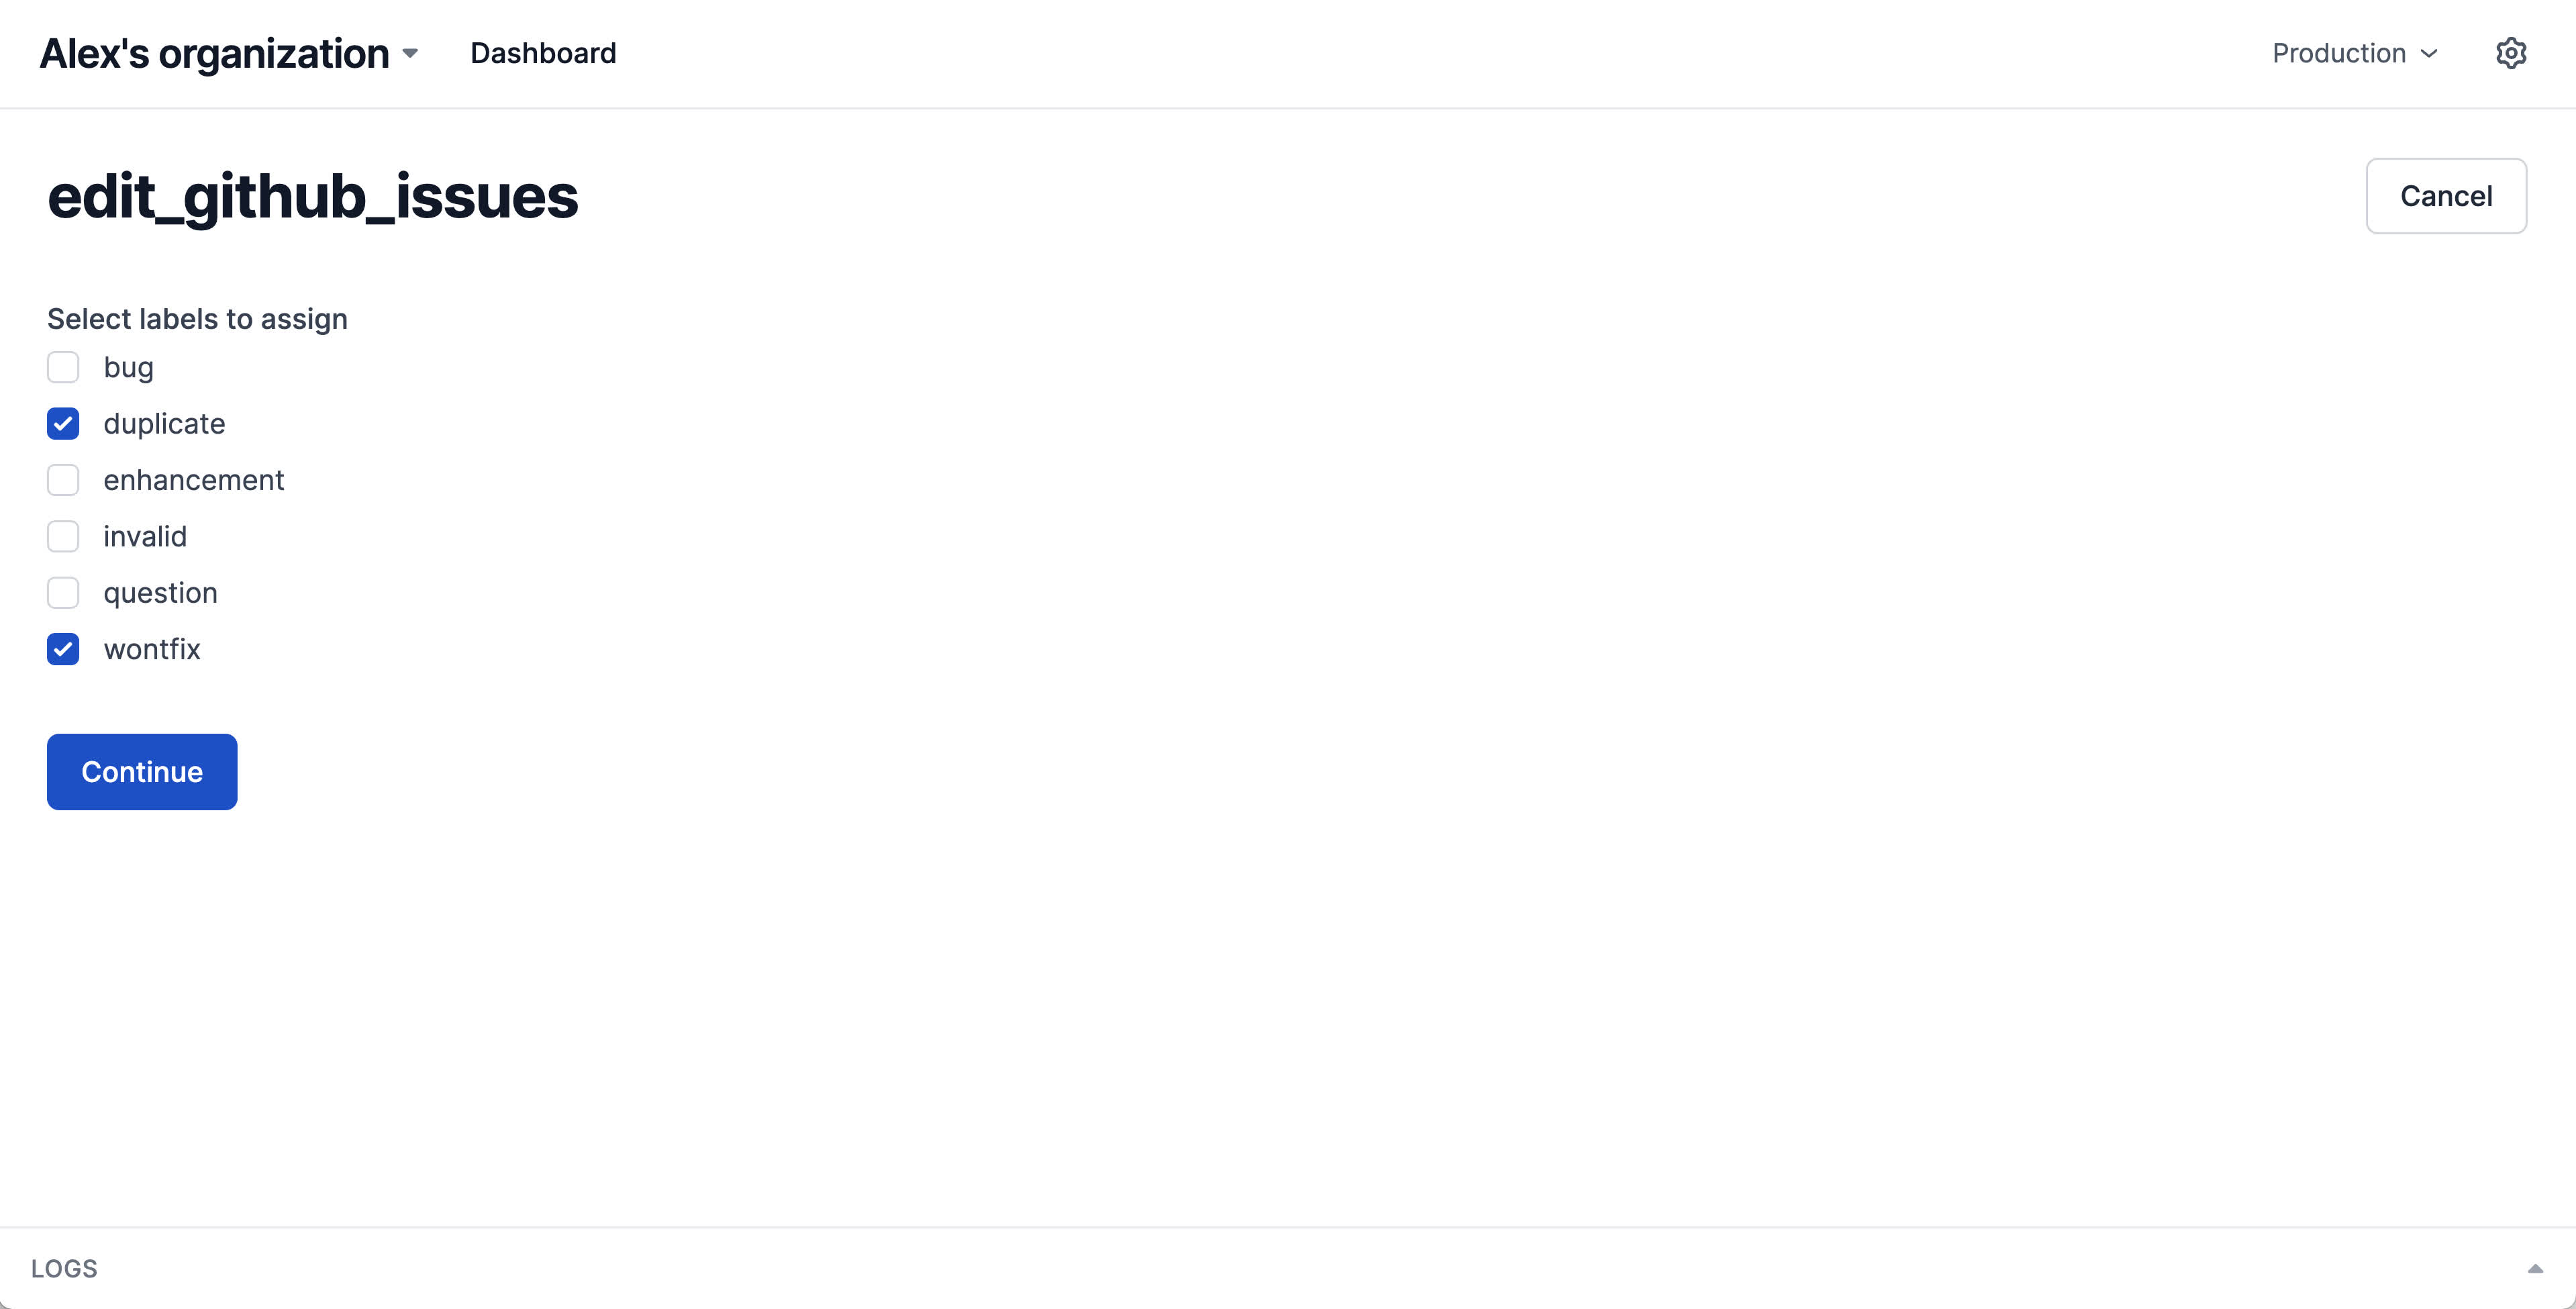
Based off the chosen operation, we'll request any additional required information and construct a request body to POST the update to GitHub.
import { Action, io } from "@interval/sdk";
import { githubAPI } from "../util";

async function githubAPI(method, url, body = null) {
  const auth = Buffer.from(
    `${process.env.GITHUB_USER}:${process.env.GITHUB_KEY}`
  ).toString("base64");
  const options = {
    method,
    headers: {
      Authorization: `Basic ${auth}`,
      Accept: "application/vnd.github.v3+json",
    },
  };

  if (body) {
    options["body"] = JSON.stringify(body);
  }

  const res = await fetch(url, options);
  return await res.json();
}

export default new Action(async () => {
  const repos = await githubAPI(
    "GET",
    "https://api.github.com/user/repos?affiliation=owner&type=public"
  );
  const selectedRepos = await io.select.table(
    "Select a repo to edit issues for",
    {
      data: repos,
      columns: [
        "full_name",
        "created_at",
        { label: "owner", renderCell: row => row.owner.login },
      ],
      maxSelections: 1,
    }
  );

  const repo = selectedRepos[0];
  const issues = await githubAPI(
    "GET",
    `https://api.github.com/repos/${repo.full_name}/issues`
  );
  const labels = await githubAPI(
    "GET",
    `https://api.github.com/repos/${repo.full_name}/labels`
  );

  const selectedIssues = await io.select.table("Select issues to edit", {
    data: issues,
    columns: [
      "title",
      "created_at",
      { label: "user", renderCell: row => row.user.login },
      "url",
    ],
  });

  const operation = await io.select.single(
    "How do you want to edit the issues?",
    {
      options: ["Close" as const, "Set labels" as const],
    }
  );

  let body = {};
  switch (operation.value) {
    case "Close":
      body["state"] = "closed";
      break;
    case "Set labels":
      const selectedLabels = await io.select.multiple(
        "Select labels to assign",
        {
          options: labels.map(label => label.name),
        }
      );
      body["labels"] = selectedLabels.map(label => label.value);
      break;
  }

  for (const issue of selectedIssues) {
    const res = await githubAPI(
      "PATCH",
      `https://api.github.com/repos/${repo.full_name}/issues/${issue.number}`,
      body
    );
    ctx.log(res);
    ctx.loading.completeOne();
  }

  return "Done!";
});
By requesting input via Interval I/O methods, Interval constructs a multi-step form to step through and collect responses, making it trivial to write a powerful tool for editing multiple issues at once.


The full source code is available for this example—it includes additional edit operations and adds a progress bar and loading state for a better user experience as GitHub API calls are made.