Best practices
While you can do a lot with Interval, it's not always clear what you should do. To get you pointed in the right direction, we've compiled these best practices to help you keep your codebase organized and get the best possible Interval experience.
Running Interval inside your existing codebase
While it's possible to run Interval in a project by itself, the best Interval experience comes from writing Interval actions within your existing codebase. This makes it easy to leverage your existing code within Interval actions and pages.
Our typical project structure uses an "interval" folder that contains a single index.ts file alongside actions and pages organized into folders:
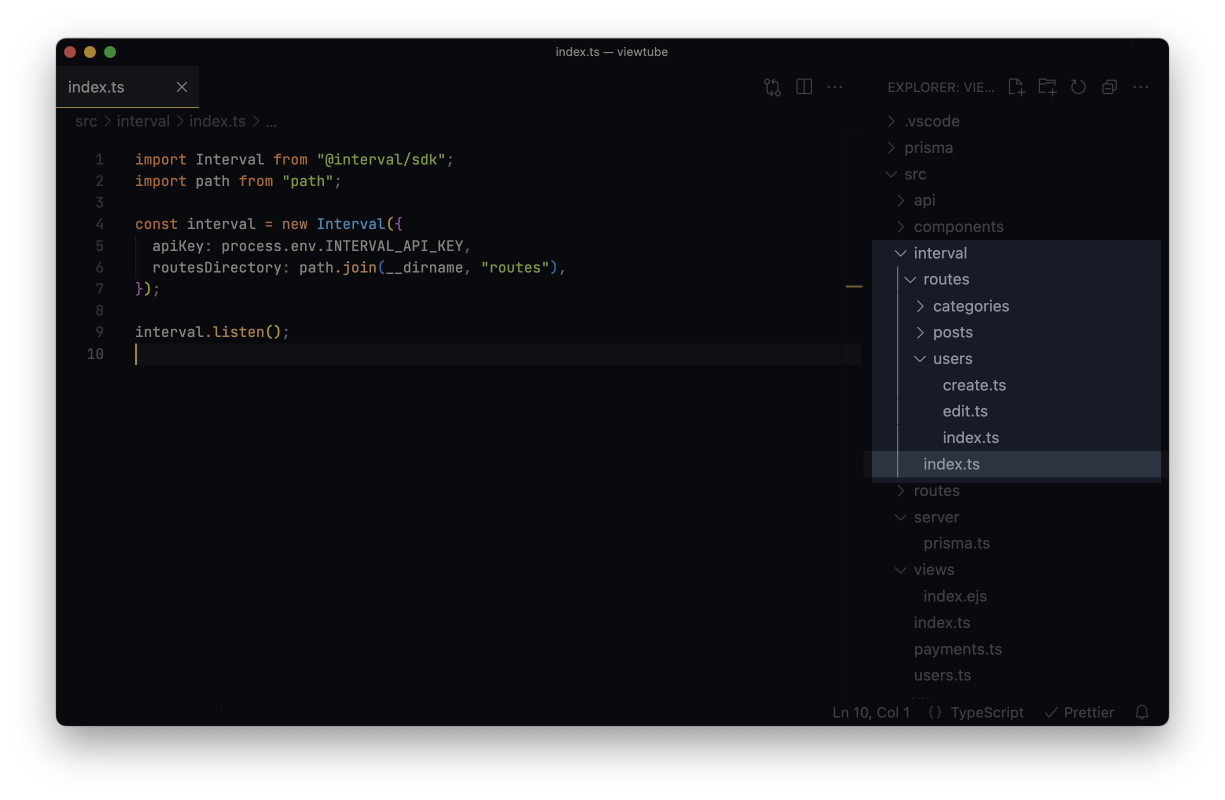
If you have a Next.js app, we recommend running Interval in a separate process. Here's our guide on how to set up a Next.js project.
Defining and organizing Interval routes
While there are a few different ways of organizing your Interval actions and pages, we recommend using file-based routing for most projects.
When you use Interval's file-based router, each action or page gets it own file on your filesystem. Your project's Interval dashboard will automatically share the hierarchy of your filesystem. For example, if you have a an action located in your project at ./interval/users/create.ts, your dashboard would list a "Create user" action inside of a "Users" folder.
If you haven't set up file-based routing in your project yet, here's how.
Routing, navigation, and hierarchy
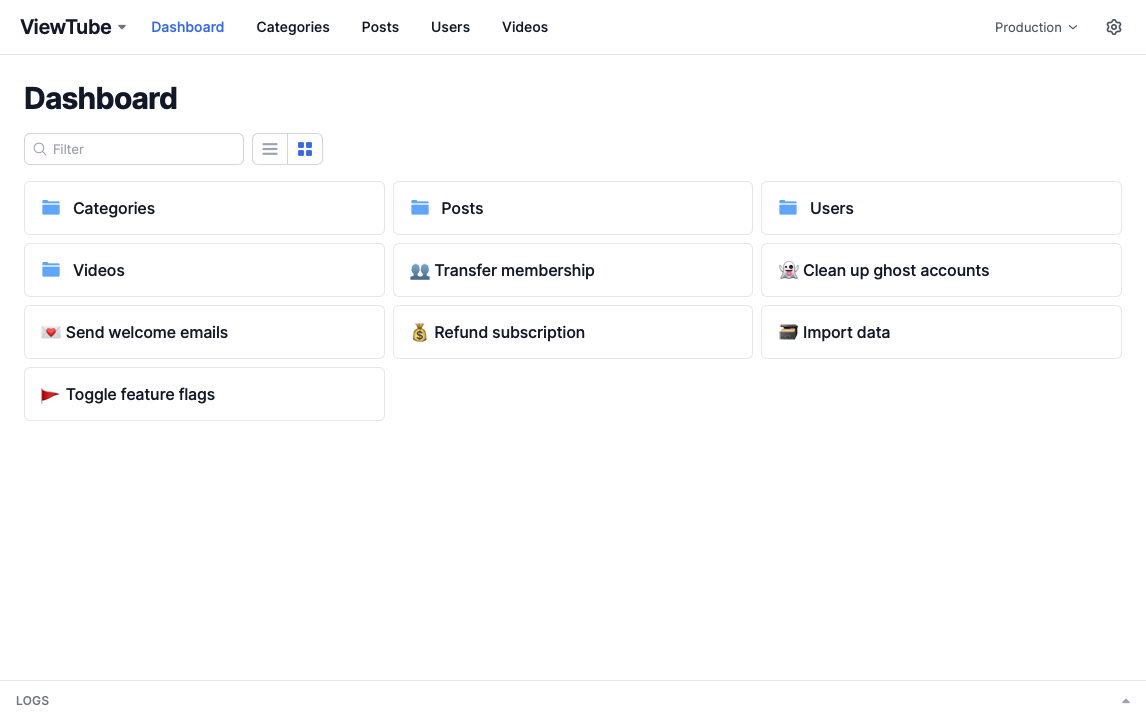
As the number of actions in your dashboard increases you'll likely want to organize related actions into groups and give some structure to your dashboard. This is possible in Interval using Pages. Pages allow you to define top-level navigation, group related actions together, and create screens with text, data, and list views to be used as a launching point for other actions.
info
Pages are available on SDK versions v0.35.0 and higher.
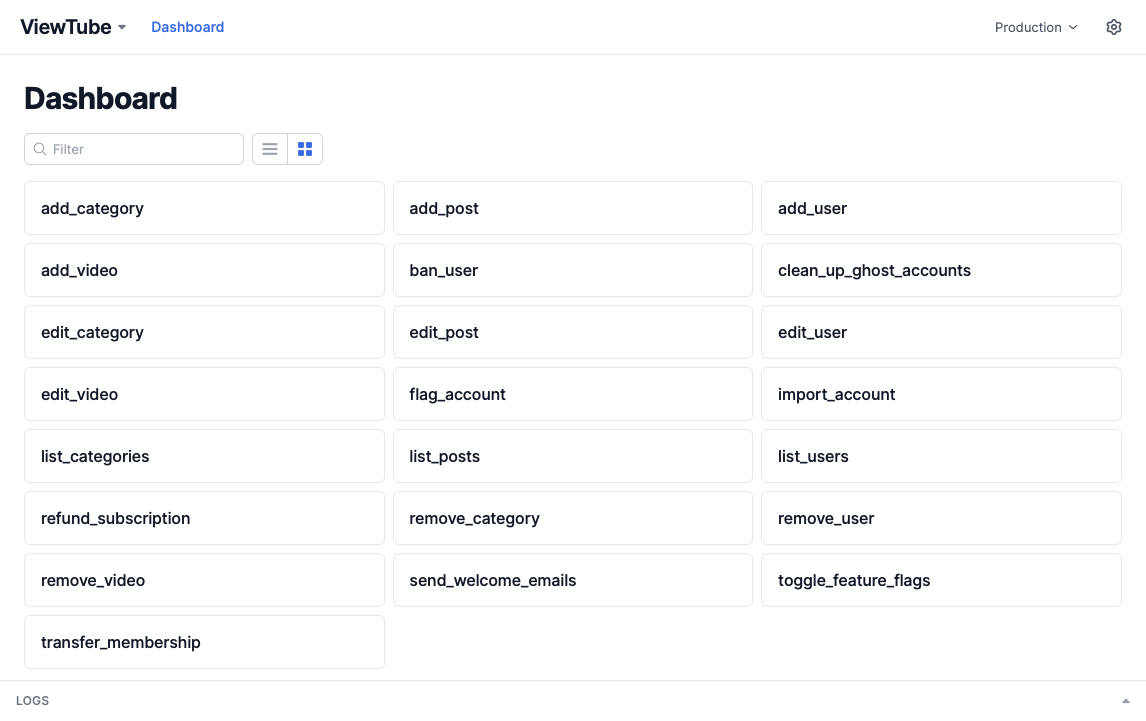
A typical dashboard that doesn't use pages might look something like this:
And here's how it looks after we've organized related actions using pages:
We also recommend giving your actions names and descriptions in code:
import { Action, io } from "@interval/sdk";

export default new Action({
  name: "👥 Transfer membership",
  description: "Removes a membership from one account and applies it to another.",
  handler: async () => {
    /* ... */
  },
});
This allows other members of your team to quickly find an action and understand what it does.
Customizing the index page
Let's say you've moved all of your actions for user accounts into a folder and your dashboard looks like this:
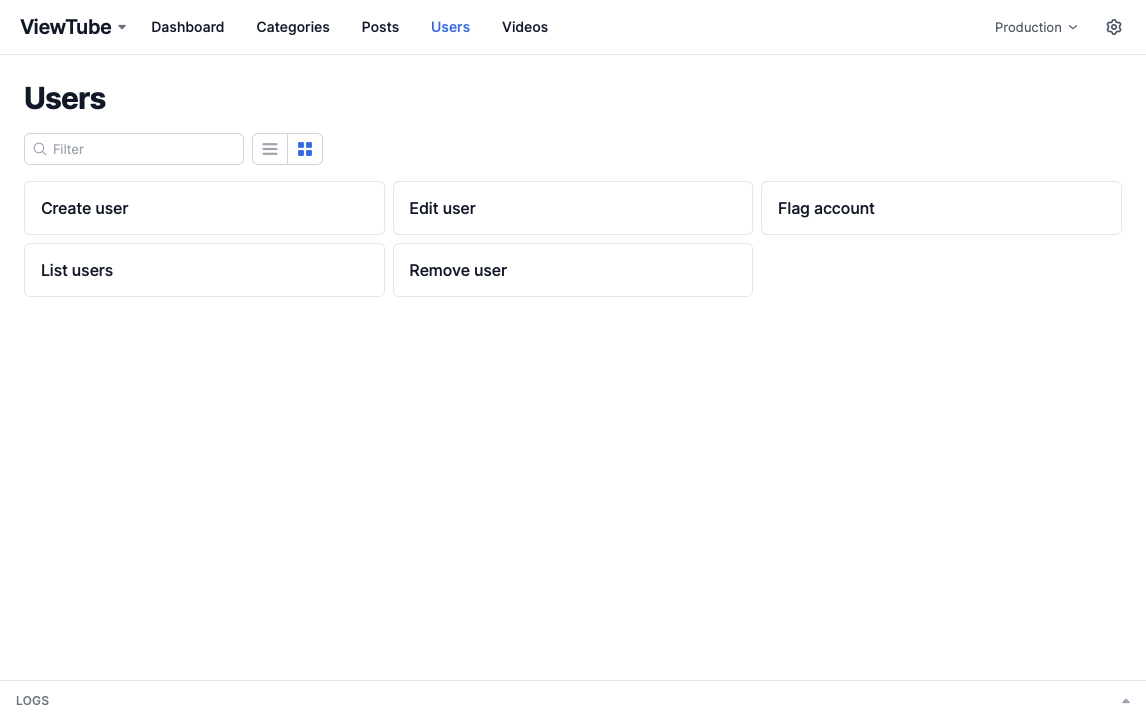
This is the default "index" screen for a page, and depending on the context this layout might be desirable. But for some resources (users, videos, posts, etc.) you might want to replace the actions list with, for example, a table:
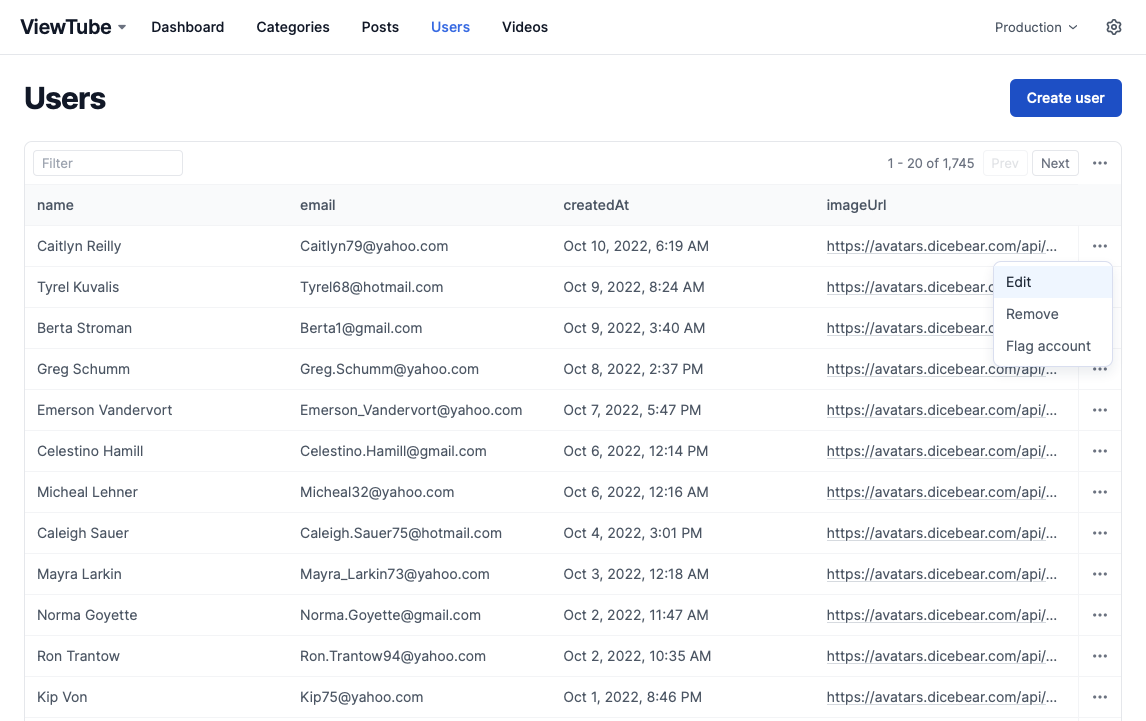
Once again we use Pages to replace the list of actions with a list of users. This means that instead of clicking 'Edit user', choosing a user, and then editing the user, you'll find the user in the table, click 'Edit' in the dropdown menu, and then edit the record. (This behavior is probably closer to what you expect from a typical "CRUD" dashboard.)
Related resources:
Sharing logic between actions
Since Interval actions and pages are just async functions, sharing logic between actions is as simple as writing shared functions.
For example, you could write a utility function for requiring a URL parameter that's imported by several of your actions:
// src/interval/utils.ts
import { ctx } from "@interval/sdk";

export function requireParam(name: string): string {
  const param = ctx.params[name];

  if (!param) {
    throw new Error(`Missing required param: ${name}`);
  }

  return String(param);
}
We also recommend reusing lookup functions (e.g. a search box that finds a user) and form fields (e.g. the fields for editing or creating a user). See more examples in Composability.